
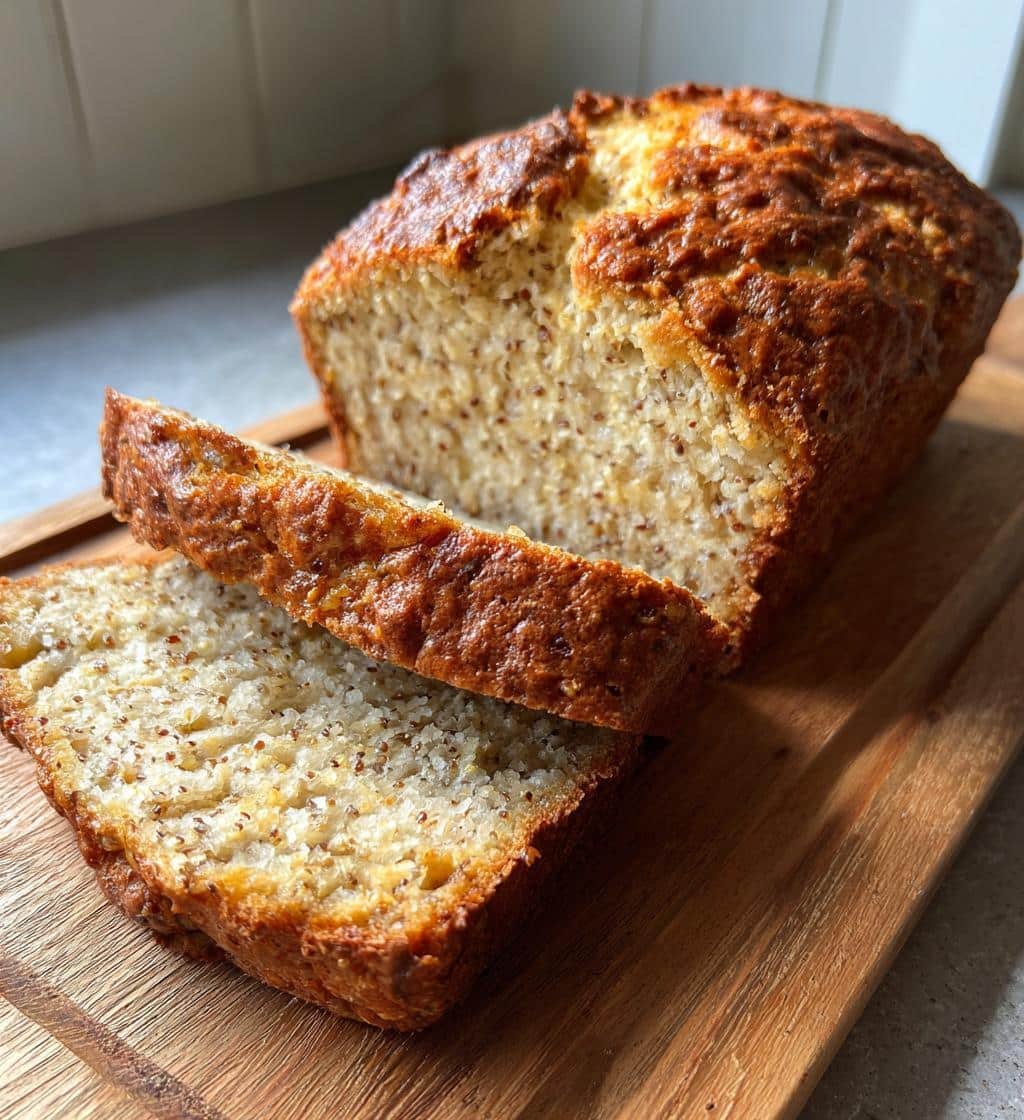
Oh my goodness, let me tell you about the magic of *Healthy Quinoa Bread*! If you’re looking for a bread that’s not only gluten-free but also packed with nutrients, you’ve stumbled upon a gem. This bread is so fluffy and satisfying; it feels like a warm hug with every slice. I remember the first time I tried making it—I was on a quest for a healthy alternative to traditional bread, and boy, did I hit the jackpot! The smell of quinoa toasting in the oven is simply irresistible, and the taste? Wow! You won’t even miss the gluten.
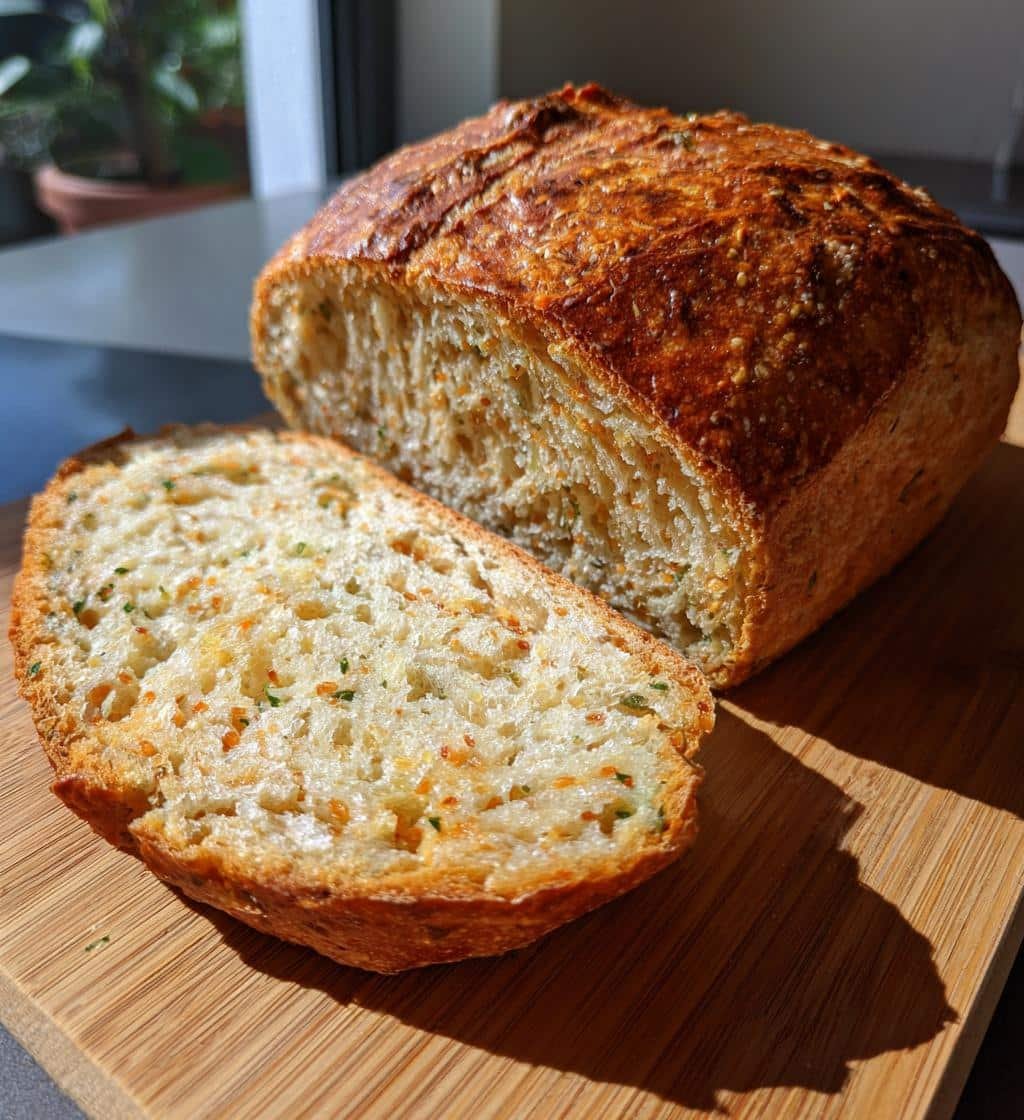
What I love most about this recipe is how versatile it is. You can slather it with your favorite spreads—think avocado, hummus, or even a simple pat of butter—and it transforms into a delightful snack or meal. Plus, knowing that it’s made with wholesome ingredients gives me that extra bit of joy as I serve it to my family. I can proudly say it’s a hit in my household, and I’m sure it will be in yours too! So, grab your mixing bowls and let’s get started on this delicious journey of making *Healthy Quinoa Bread* together!
Ingredients for Healthy Quinoa Bread
Alright, let’s gather our ingredients! This part is super simple, but every item counts towards making that perfect loaf of *Healthy Quinoa Bread*. Here’s what you’ll need:
- 2 cups cooked quinoa: Make sure your quinoa is nice and fluffy! Just cook it according to the package instructions and let it cool a bit before using. This is what gives the bread its wonderful texture and nutrition.
- 1 cup almond flour: This gluten-free flour adds a lovely nuttiness to the bread. If you don’t have almond flour, you could try using other nut flours, but almond really is my favorite!
- 1/2 cup ground flaxseed: This is my secret weapon! Ground flaxseed not only thickens the batter but also adds a boost of fiber and omega-3 fatty acids. Trust me, you’ll want this in there for that extra health kick.
- 1/4 cup honey or maple syrup: Either sweetener works beautifully, so pick whichever you love more! Honey lends a subtle floral sweetness, while maple syrup gives a nice earthy flavor.
- 1/4 cup olive oil: This adds moisture to the bread and keeps it tender. I always use a good quality extra virgin olive oil for that rich taste.
- 1 teaspoon baking powder: This is our leavening agent. It helps the bread rise and become fluffy. Make sure it’s fresh for the best results!
- 1/2 teaspoon salt: Don’t skip the salt! It enhances all the flavors and balances the sweetness of the honey or maple syrup.
- 4 large eggs: The eggs are essential for binding everything together and adding protein. Make sure they’re at room temperature for easier mixing!
Gather all these ingredients, and you’ll be well on your way to creating something truly special. Each one plays a role in making this bread not only delicious but also packed with nutrients. Let’s keep the momentum going and move on to the next step!
How to Prepare Healthy Quinoa Bread
Now that we’ve got our ingredients ready, it’s time to roll up our sleeves and bring this *Healthy Quinoa Bread* to life! Don’t worry, it’s a straightforward process, and I’ll guide you every step of the way. Let’s dive into the details!
Step-by-Step Instructions
- Preheat your oven: First things first, let’s get that oven nice and hot! Preheat it to 350°F (175°C). This is crucial because we want our bread to bake evenly and rise perfectly.
- Mix the dry ingredients: In a large mixing bowl, combine the cooked quinoa, almond flour, ground flaxseed, baking powder, and salt. Use a whisk to combine everything well—this step helps ensure even distribution of the baking powder and salt throughout the batter. You want it all to be blended smoothly!
- Prepare the wet ingredients: In another bowl, crack the four large eggs and beat them lightly. Then add in your choice of honey or maple syrup, along with the olive oil. Mix these together until it looks smooth and well combined. This is where the magic happens, so take a moment to enjoy the sweet aroma!
- Combine wet and dry: Now it’s time to bring it all together! Pour the wet mixture into the bowl with the dry ingredients. Gently fold everything together using a spatula or wooden spoon. You want to mix until you see no more dry spots, but be careful not to overmix. Trust me, we want that lovely texture!
- Prepare your loaf pan: Grab a greased loaf pan and pour the batter in. Make sure to spread it out evenly. I like to give the pan a little shake to help settle the batter and get rid of any air bubbles that may have formed. It’s such a satisfying moment!
- Bake it up: Place your loaf pan in the preheated oven and bake for about 30-35 minutes. You’ll know it’s ready when you insert a toothpick in the center and it comes out clean. The smell wafting through your kitchen will be heavenly, I promise!
- Cool before slicing: Once it’s done baking, take it out and let it cool in the pan for about 10 minutes. Then gently transfer it to a wire rack to cool completely. This is super important because slicing it too soon can make it a bit gummy. Patience pays off!
And there you have it! Follow these steps, and you’ll end up with a beautiful loaf of *Healthy Quinoa Bread* that’s ready to be enjoyed. It’s the perfect addition to any meal or a delightful snack on its own. Can’t wait for you to taste it!
Nutritional Information for Healthy Quinoa Bread
Okay, let’s talk numbers! Knowing the nutritional breakdown of your *Healthy Quinoa Bread* makes it even more exciting to whip up. Here’s what you can expect per slice, and remember, these are estimates:
- Calories: 150
- Fat: 7g
- Saturated Fat: 1g
- Unsaturated Fat: 6g
- Trans Fat: 0g
- Carbohydrates: 18g
- Fiber: 3g
- Sugar: 5g
- Sodium: 150mg
- Protein: 5g
- Cholesterol: 70mg
Isn’t that fantastic? Each slice is not only delicious but also packed with nutrients. The combination of quinoa, flaxseed, and almond flour provides a healthy dose of protein and fiber, making this bread a wholesome choice for any time of day. Enjoy knowing that you’re treating your body well with every bite!
Tips for Success with Healthy Quinoa Bread
Alright, before you dive into baking, let me share some of my favorite tips to ensure your *Healthy Quinoa Bread* turns out absolutely perfect every time. Trust me, these little nuggets of wisdom can make a world of difference!
Check the Consistency of the Batter
When you mix your ingredients, take a moment to check the batter’s consistency. It should be thick but pourable—think of a smooth pancake batter. If it feels too dry, you can add a splash of water or a little more olive oil to loosen it up. This will help your bread rise nicely and stay moist!
Don’t Skip the Cooling Time
This is a big one! Letting your bread cool completely before slicing is crucial. I know it’s tempting to dive in while it’s still warm (and trust me, I’ve been there!), but slicing too soon can lead to a gummy texture. So, be patient! Allow it to cool for at least 10 minutes in the pan, then transfer it to a wire rack. You’ll be rewarded with clean, beautiful slices.
Use Fresh Ingredients
Always check your baking powder for freshness. Old baking powder can affect how well your bread rises, leading to a denser loaf than you want. If you want to test it, simply mix a teaspoon of baking powder with a little vinegar; if it bubbles up, it’s good to go! Fresh ingredients make all the difference.
Experiment with Add-Ins
Feel free to get creative! You can add ingredients like sunflower seeds, pumpkin seeds, or even dried herbs to the batter for an extra flavor boost. Just remember to keep the ratios the same, so you don’t throw off the bread’s structure. It’s a fun way to personalize your bread!
Store it Right
If you happen to have leftovers (which is rare in my house!), make sure to store your *Healthy Quinoa Bread* in an airtight container. It’ll stay fresh for a few days at room temperature or you can freeze it for up to three months. Just remember to slice it before freezing for easy grab-and-go options!
By following these tips, you’ll be on your way to creating a delicious loaf of *Healthy Quinoa Bread* that wows your family and friends. Happy baking!
Variations of Healthy Quinoa Bread
Oh, the fun you can have with *Healthy Quinoa Bread*! The base recipe is fantastic on its own, but if you’re like me and love to tweak things, there are so many delicious variations you can try. Here are some of my favorite ideas to inspire your creativity:
Add Seeds for Crunch
Want to add a delightful crunch? Toss in some seeds! I love adding sunflower seeds or pumpkin seeds to the mix. Just throw in about 1/4 cup to the dry ingredients before combining them with the wet. They give the bread a lovely texture and are packed with nutrients!
Herbs for Flavor
If you want to give your bread a savory twist, consider adding fresh or dried herbs. Rosemary and thyme work beautifully together. Just chop a tablespoon of fresh herbs or use a teaspoon of dried ones and mix them into the dry ingredients. The aroma while baking will be heavenly!
Spices for Warmth
For a touch of warmth and sweetness, you can add cinnamon or nutmeg. A teaspoon of cinnamon will give your bread a cozy flavor that pairs perfectly with honey or maple syrup. It’s like a warm hug in every bite!
Cheese for Richness
Feeling adventurous? Try adding some shredded cheese! About 1/2 cup of sharp cheddar or feta can turn this bread into a savory delight. Just fold it into the batter before pouring it into the loaf pan. It’s a game-changer!
Fruit for Sweetness
If you’re in the mood for something sweeter, add some dried cranberries or chopped walnuts. A handful of dried cranberries gives a lovely pop of sweetness and a beautiful contrast to the nutty flavor of the quinoa. Just don’t go overboard—about 1/4 cup should do the trick!
These variations make your *Healthy Quinoa Bread* uniquely yours. Feel free to experiment and find the combination that makes your taste buds sing! I can’t wait to hear what creative twists you come up with!
Storage & Reheating Instructions for Healthy Quinoa Bread
Now that you’ve baked your delicious *Healthy Quinoa Bread*, let’s talk about how to store those precious leftovers! Proper storage is key to keeping your bread fresh and tasty. Trust me, you’ll want to savor every last bite!
Storing Leftovers
Once your bread has completely cooled, slice it up and store it in an airtight container. This will help keep it moist and prevent it from drying out. If you’re planning to eat it within a few days, just pop it on the countertop. It stays fresh for about 3-5 days at room temperature.
If you know you won’t finish it in that time frame, go ahead and freeze your slices! I like to wrap them individually in plastic wrap and then place them in a freezer bag. This way, you can grab just what you need without having to thaw the whole loaf. It can last in the freezer for up to three months!
Reheating Tips
When you’re ready to enjoy a slice (or two), reheating is super simple. If you’re pulling it from the fridge, just pop it in the microwave for about 15-20 seconds to warm it up. If you’re reheating from frozen, I recommend letting it thaw in the fridge overnight first, then giving it a quick zap in the microwave.
If you love that freshly baked taste and texture, you can also reheat it in the oven. Preheat your oven to 350°F (175°C), wrap the slices in foil, and warm them for about 10 minutes. This method helps restore that lovely crust and makes the bread feel just baked again!
By following these storage and reheating tips, you’ll ensure every slice of your *Healthy Quinoa Bread* stays delicious, whether it’s the first slice or the last. Enjoy every moment of this wholesome delight!
Why You’ll Love This Healthy Quinoa Bread
- Quick and Easy to Make: With just a few simple steps, you can whip up this delicious bread in no time. It’s perfect for busy mornings or last-minute snacks!
- Nutrient-Packed: Made with quinoa, almond flour, and flaxseed, this bread is loaded with protein, fiber, and healthy fats, making it a wholesome choice for any meal.
- Gluten-Free: If you’re avoiding gluten, this recipe is a fantastic alternative that doesn’t compromise on taste or texture. Say goodbye to gummy gluten-free breads!
- Versatile Base: This bread can be enjoyed in so many ways! Whether you top it with avocado, make a sandwich, or simply enjoy it plain, it adapts to your cravings.
- Customizable: Feel free to add your favorite seeds, herbs, or spices for a personal touch. Each variation can give you a whole new flavor experience!
- Great for Meal Prep: Bake a loaf ahead of time and have healthy slices ready to go for breakfasts, snacks, or sandwiches throughout the week.
- Delicious Aroma: The smell of this bread baking is heavenly! You’ll enjoy the warm, inviting scents that fill your kitchen as it bakes.
Trust me, once you try this *Healthy Quinoa Bread*, you’ll be hooked! It’s not just good for you, but it also tastes amazing. What’s not to love? For more ideas on healthy eating, check out this healthy marinated cucumbers salad.
Frequently Asked Questions about Healthy Quinoa Bread
Q1: Can I substitute the almond flour with another type of flour?
Absolutely! While almond flour gives a lovely flavor and texture, you can use other gluten-free flours like coconut flour or a gluten-free all-purpose blend. Just keep in mind that different flours may absorb moisture differently, so you might need to adjust the liquid in the recipe. Experimenting can lead to delicious discoveries!
Q2: What if I don’t have ground flaxseed?
No worries! If you can’t find ground flaxseed, you can replace it with chia seeds or even a tablespoon of unsweetened applesauce. Both alternatives will still help with binding the ingredients together, maintaining that delightful texture.
Q3: Can I make this bread in advance?
Definitely! This *Healthy Quinoa Bread* is perfect for meal prepping. You can bake it ahead of time and store it in an airtight container for a few days at room temperature. If you want to keep it longer, slice it up and freeze it! Just remember to wrap the slices tightly to keep them fresh.
Q4: What are some delicious toppings for this bread?
Oh, the possibilities are endless! You can enjoy it with creamy avocado, a smear of hummus, or even a drizzle of honey or maple syrup. For a savory touch, try it with a slice of cheese or some nut butter. The bread’s flavor pairs well with just about anything!
Q5: How can I tell when the bread is done baking?
Great question! The best way to check is by doing the toothpick test. Insert a toothpick in the center of the loaf; if it comes out clean or with just a few moist crumbs, your bread is ready. Additionally, the edges should pull slightly away from the pan, and the bread will have a lovely golden color. Happy baking!
Healthy Quinoa Bread: 7 Reasons You’ll Love This Recipe
- Total Time: 50 minutes
- Yield: 1 loaf
- Diet: Gluten Free
Description
A nutritious and gluten-free bread made with quinoa.
Ingredients
- 2 cups cooked quinoa
- 1 cup almond flour
- 1/2 cup ground flaxseed
- 1/4 cup honey or maple syrup
- 1/4 cup olive oil
- 1 teaspoon baking powder
- 1/2 teaspoon salt
- 4 large eggs
Instructions
- Preheat the oven to 350°F (175°C).
- In a bowl, mix cooked quinoa, almond flour, ground flaxseed, baking powder, and salt.
- In another bowl, beat the eggs, then add honey or maple syrup and olive oil.
- Combine the wet and dry ingredients, mixing until smooth.
- Pour the batter into a greased loaf pan.
- Bake for 30-35 minutes or until a toothpick comes out clean.
- Let cool before slicing.
Notes
- Store leftovers in an airtight container.
- This bread can be frozen for up to 3 months.
- Serve with your favorite spreads.
- Prep Time: 15 minutes
- Cook Time: 35 minutes
- Category: Bread
- Method: Baking
- Cuisine: Global